Follow the instructions below to familiarize yourself with the calendar layout and
features.
1. Event details
Select the appropriate calendar group, name, start, and end date.
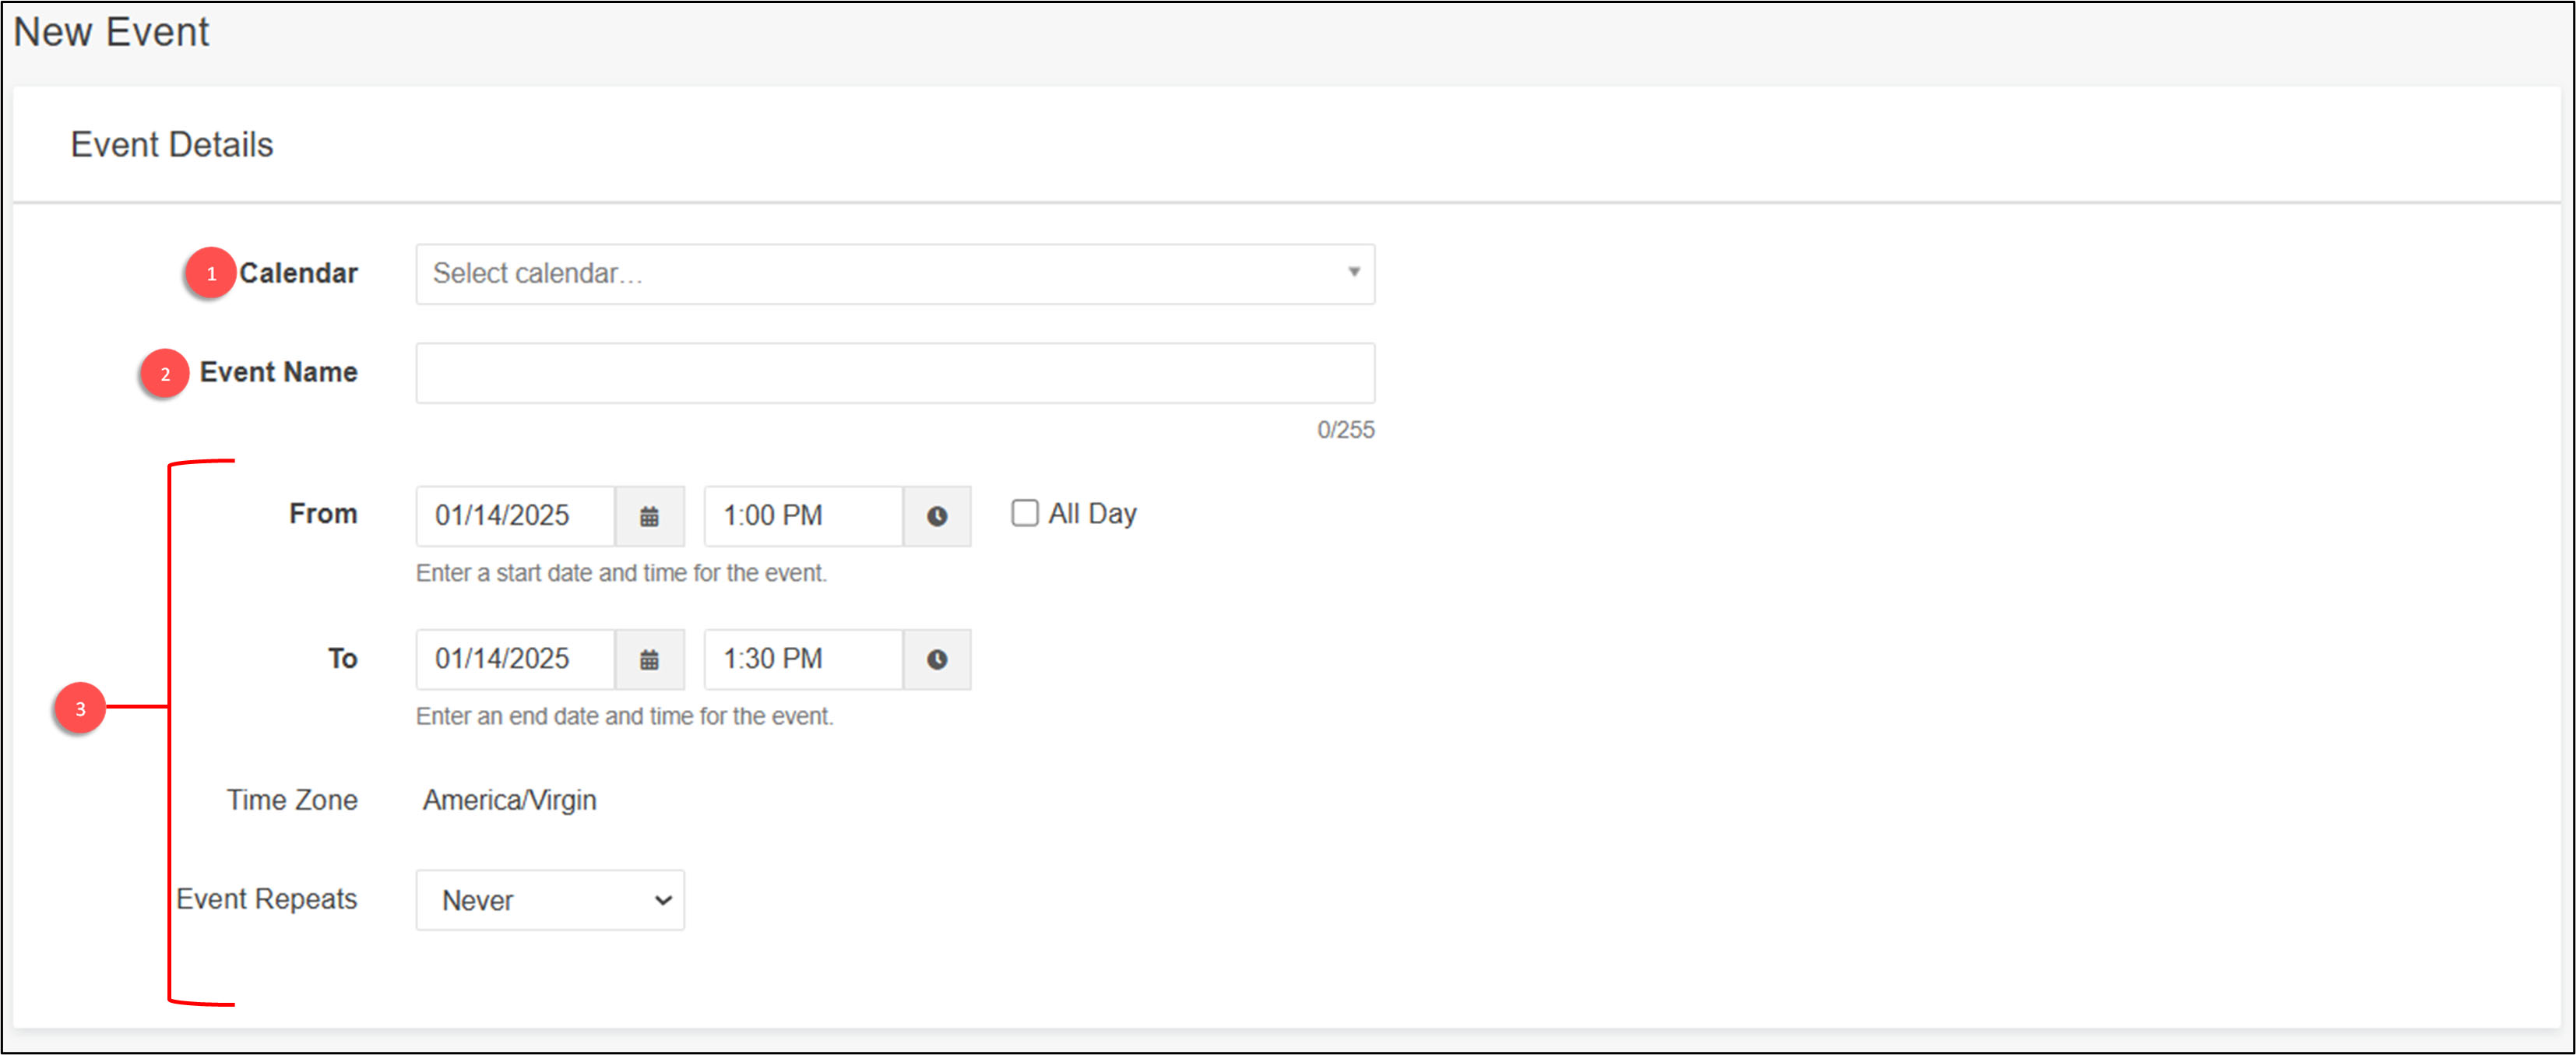
- Choose the calendar on which the event will be displayed. (The default calendar is
General)
- Shows the name that will be displayed on the calendar.
- Sets the time when the event starts and ends. (The event must have an end date)
2. Additional details
Provide the details about the event. The width of the attached image should not exceed
500px, and the "Image Alt Text" must always be included.
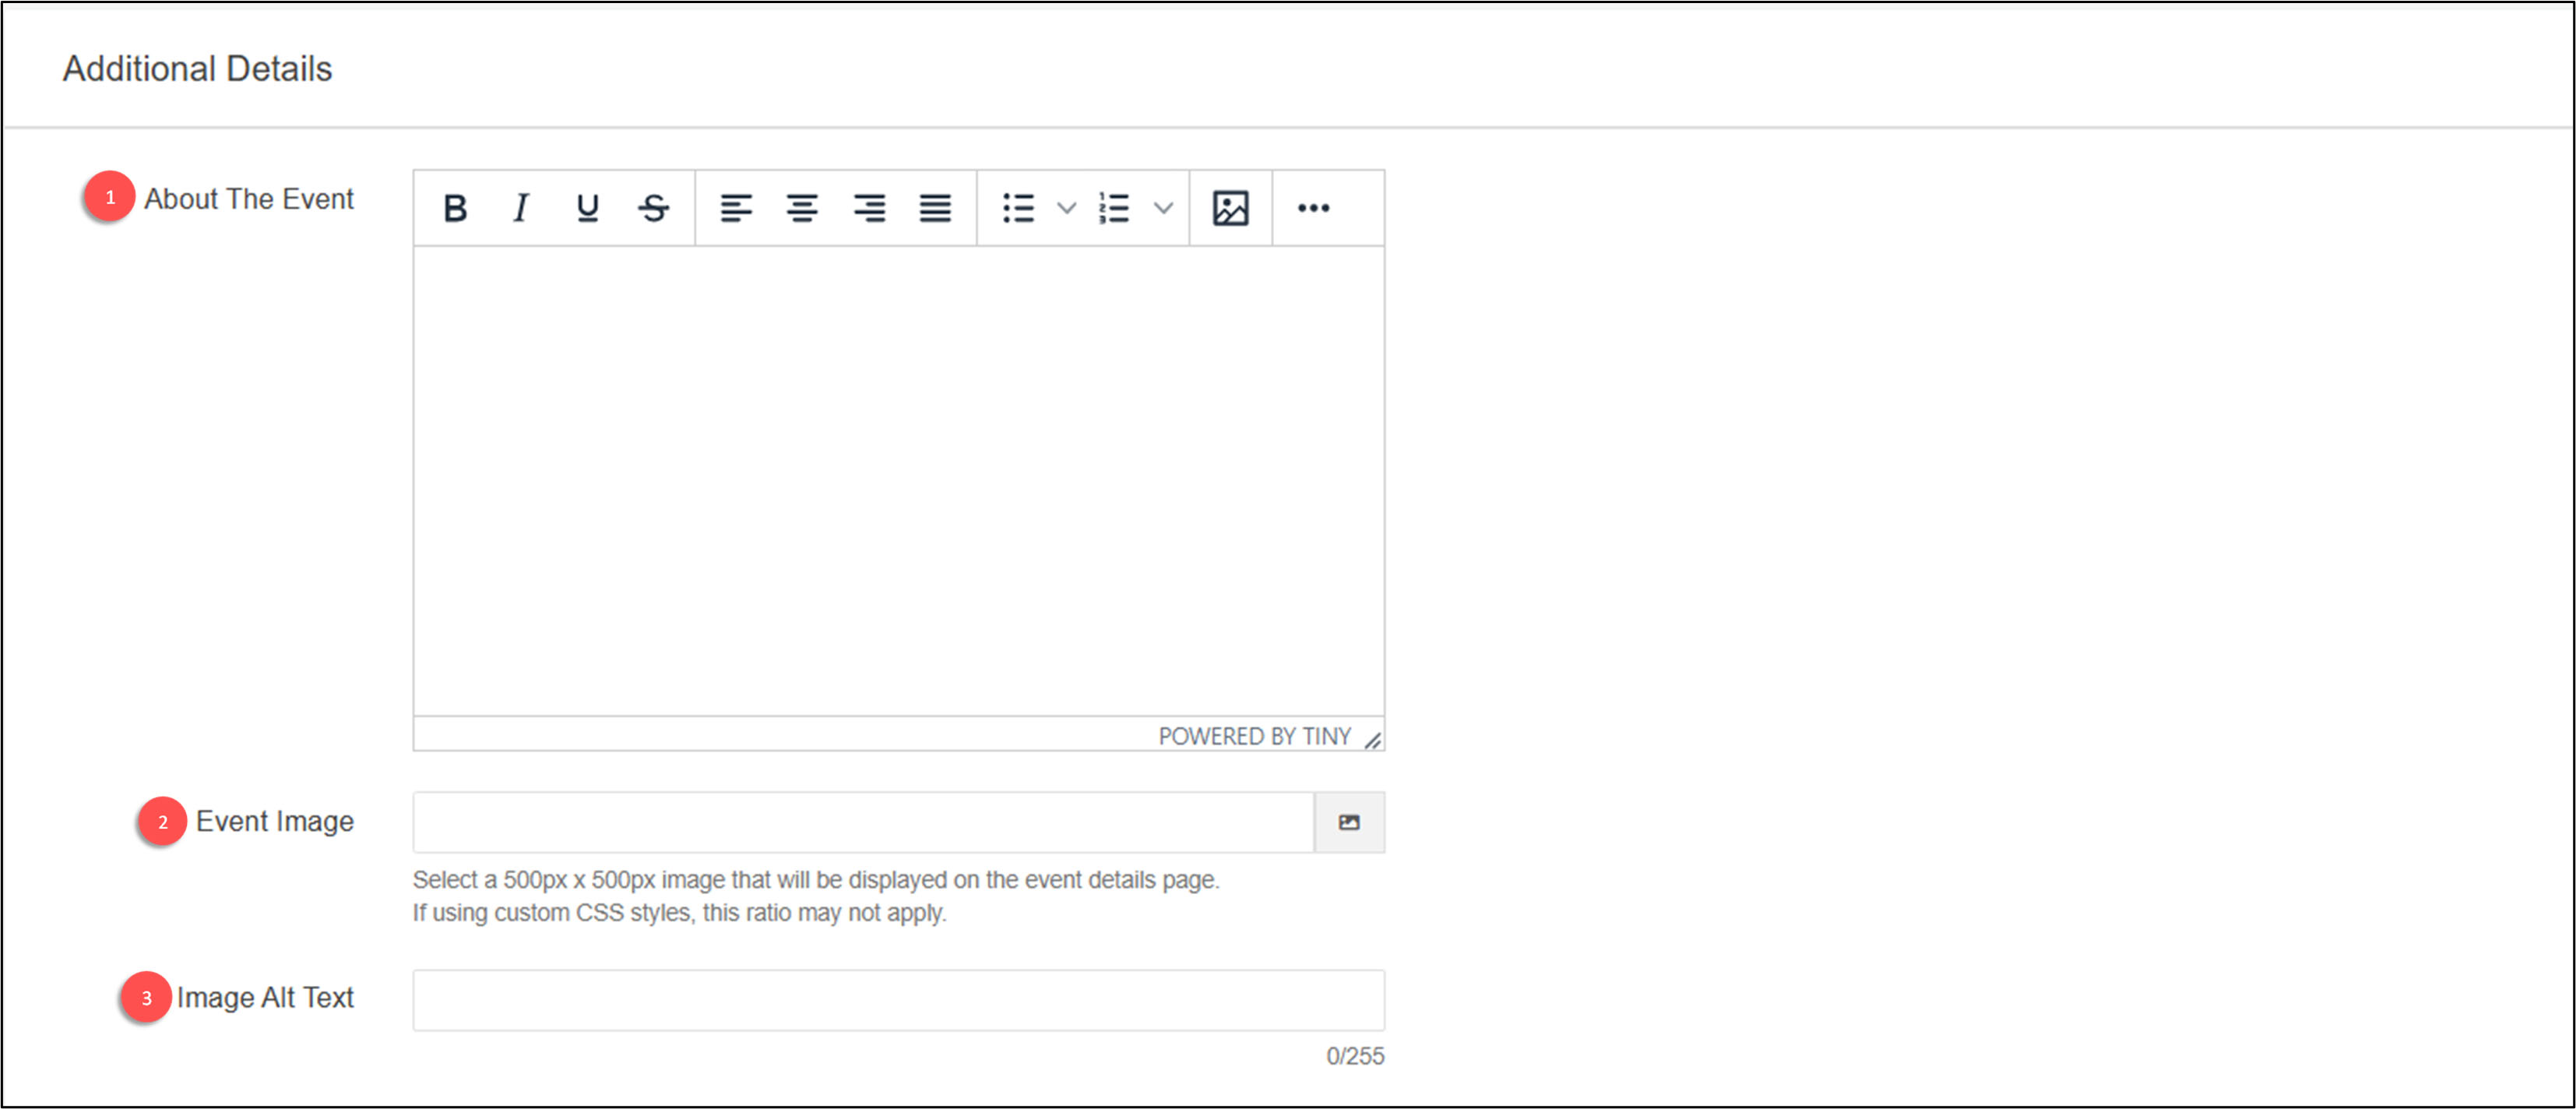
- Provide details about the event, including the date, location, contact information,
links, and any relevant information viewers should know.
- Attach the provided flyer image. (Image width should be no more than 500px)
- Always give an Image Alt Text, this should be the name of the attached image.
Example of images:
This is an image with a width of 500px and a height of 500px

This is an image with a width of 500px and a height of 650px

- Image ALT Text is a word or phrase to tell Web site viewers the nature or contents
of an image.
- When adding new images, make sure the new image has a file size under 1MB and doesn't
have any spaces.
- The only special characters allowed are underscores, dashes, and periods.
Help|
How to attach an image
3. Organizer
An organizer must be specified

- Select the organizer of the event.
- Select a category to group multiple events. (Not required)
4. Location
Specify the location of the event.
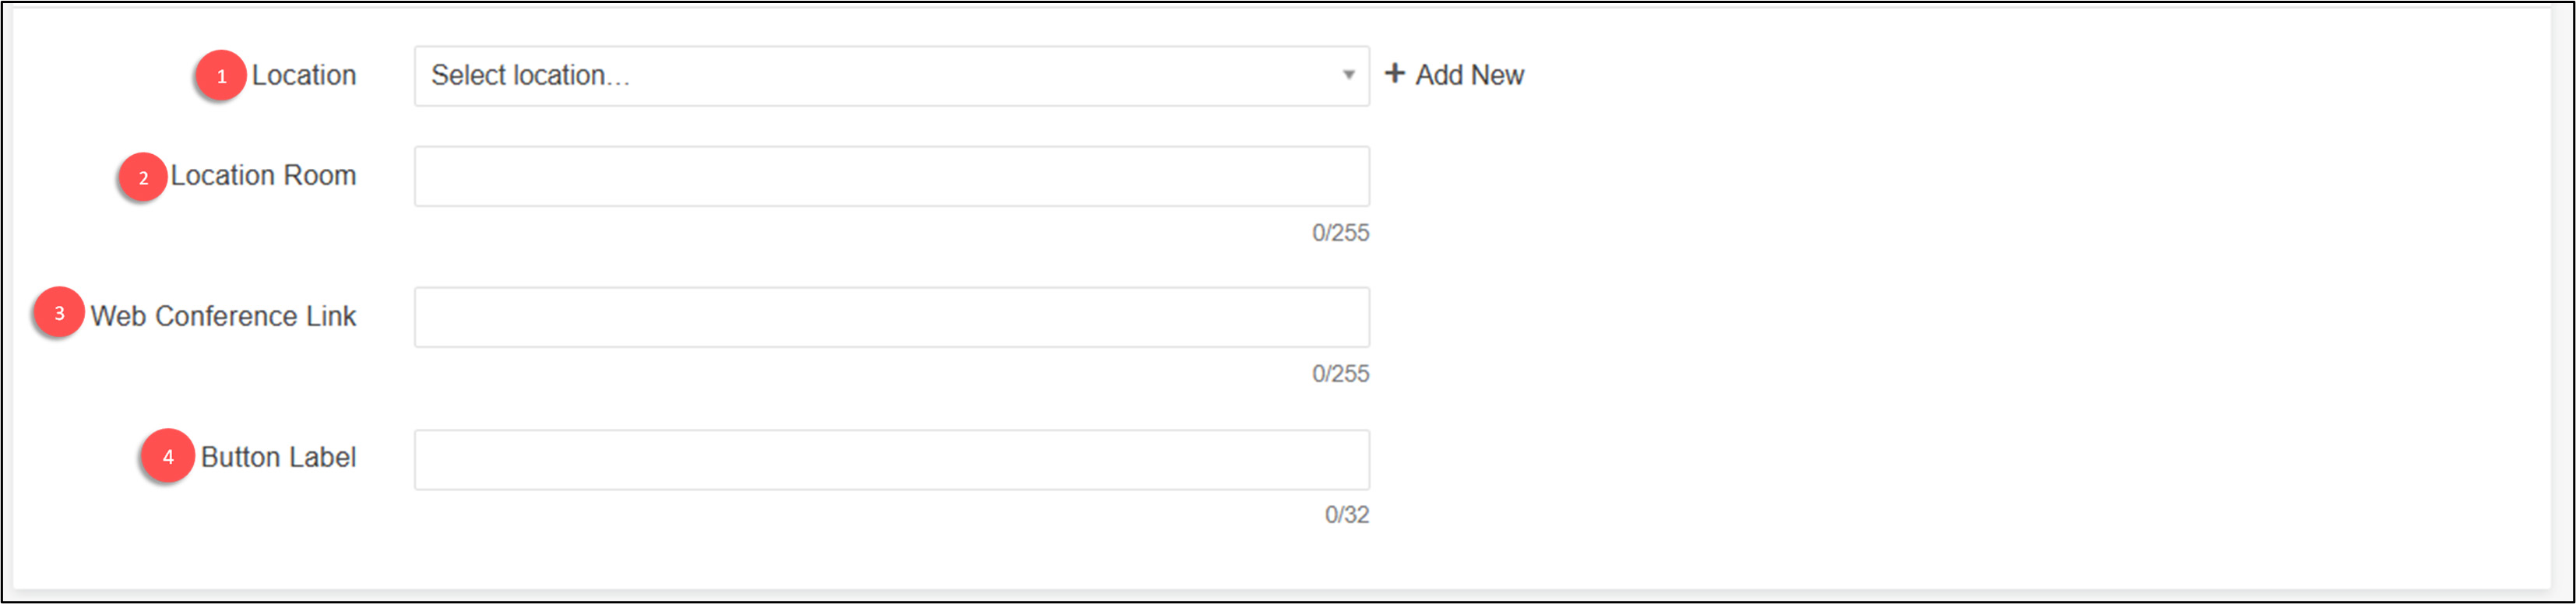
- Select the location of the event from the dropdown list.
- State the specific venue for the event.
- For virtual events, please enter the web conference link here.
- For virtual events, this button will open the link to the web conference. Please name
it appropriately.
5. Cost
Specify the cost of the event and provide links for ticket purchases.
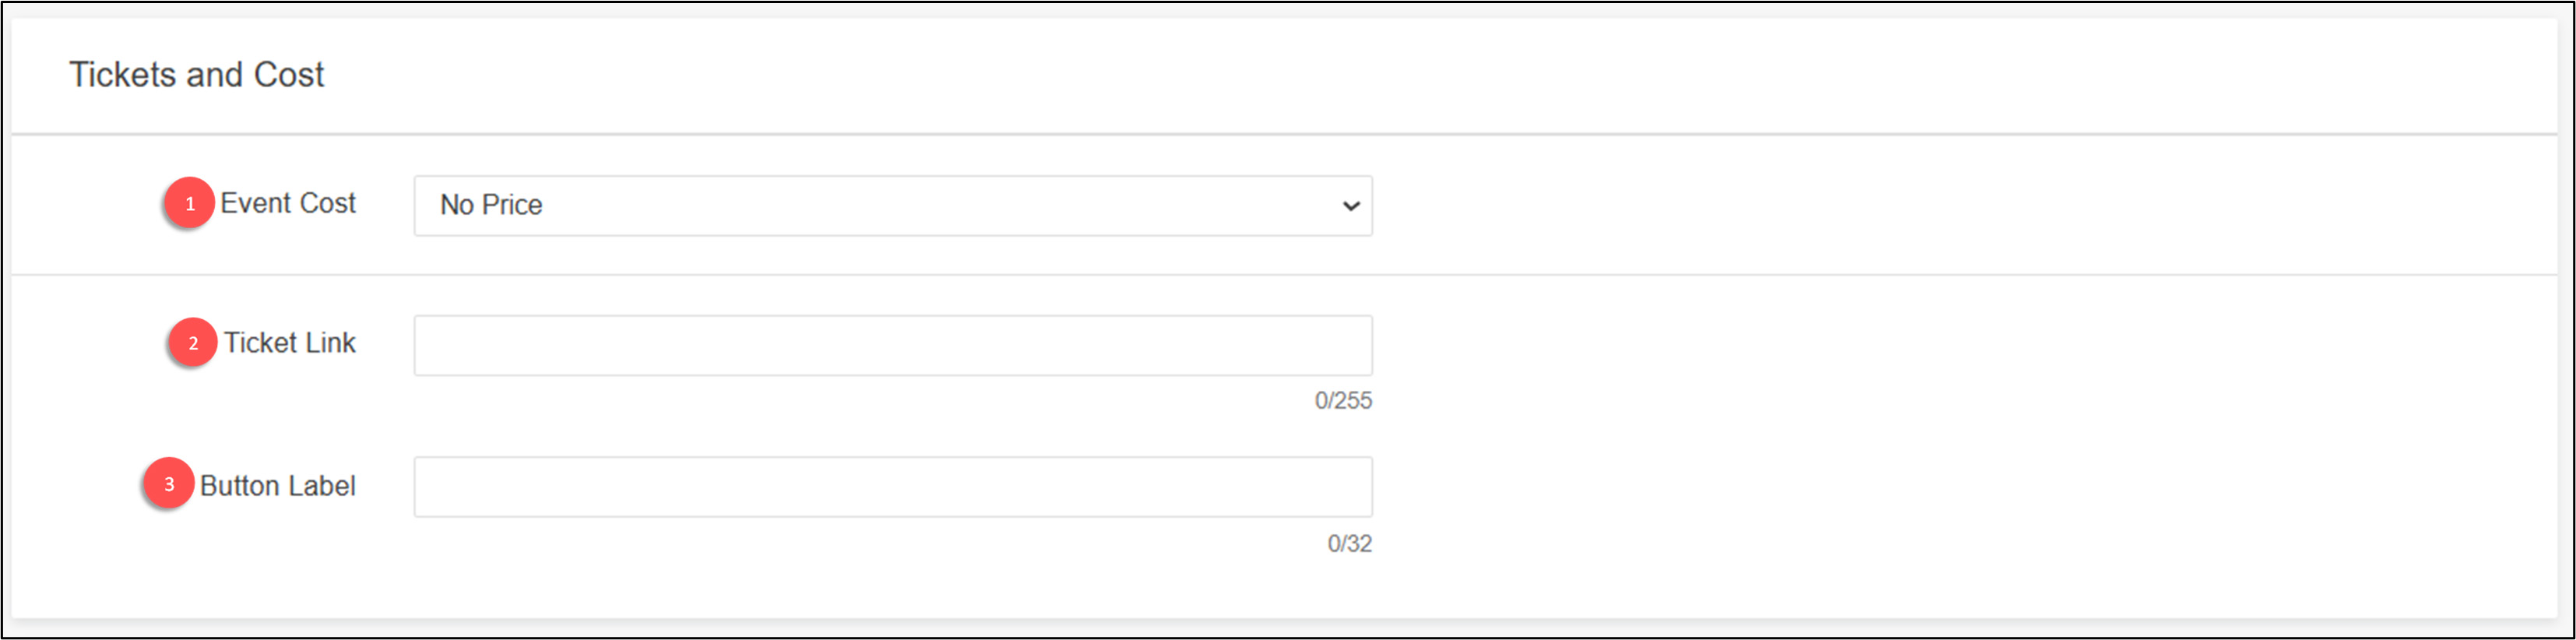
- If your event comes with a fee, enter the Event Cost here.
- If the ticket can be purchased online enter the link here.
- Please include a ticket link with the button label “RSVP” or a preferred label.
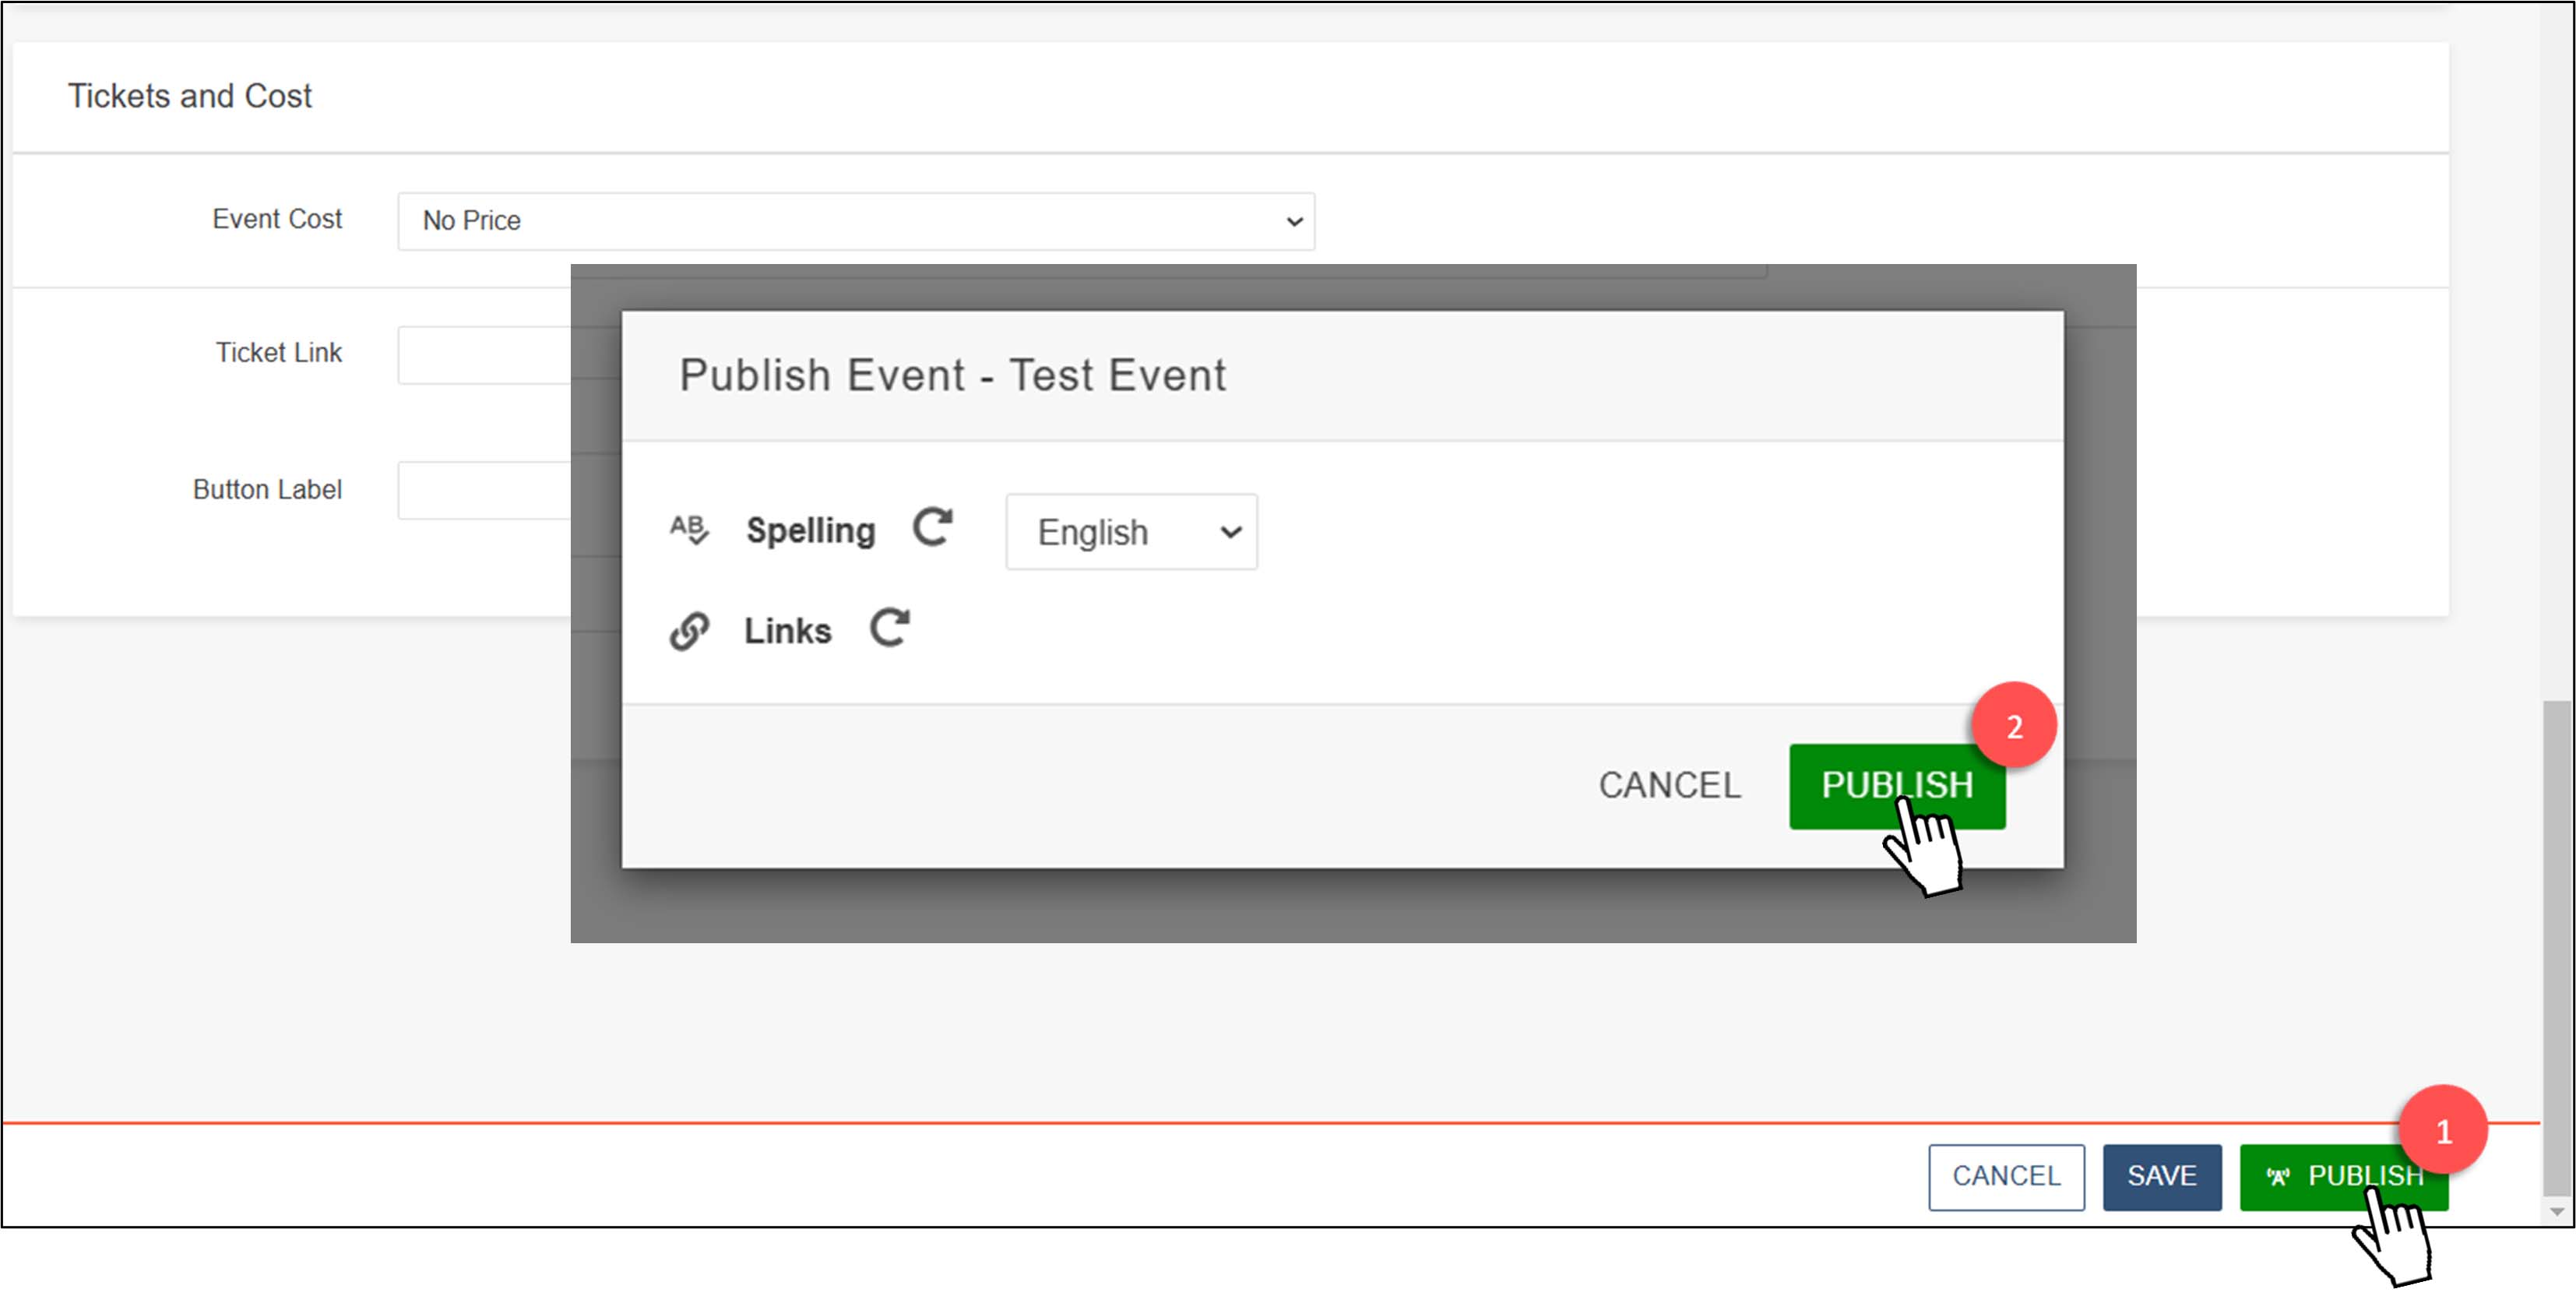
6. Review and Publish
To complete the calendar event creation and make it public, click the publish button
in the screen's bottom right corner. Then, when the popup appears, click to confirm.